InQuiry Printing Agent
InQuiry supports custom printing in multiple browsers using a printing agent application. Users can preview and print notes, cover letters, envelopes, and faxes from Chrome, Edge, and Firefox.
Minimum Application Requirements
For optimal compatibility, your system must meet minimum software and hardware requirements.
Installing the Printing Agent
Info
An MSI installer is available at Application Downloads if one is needed for group policies. For individual installations, please follow the steps below.
If needed, a Cleanup Tool is also available on the Application Downloads page. This tool fully removes all versions of the Printing Agent that cannot be uninstalled through standard methods.
If it is your first time using this feature, you must install the agent.
To begin, initiate a preview or print job from the Note Viewer or use Print All/Print Selected from a workflow folder. The Print Request Progress window will open.
Click the InQuiry Printing Agent link in the Print Request Progress window to download the installer. Admin rights are not required.

Click on the downloaded file to install the Printing Agent.

When installation is complete, close the Print Request Progress window in InQuiry and initiate the preview or print command again to be prompted to log in to the Printing Agent.
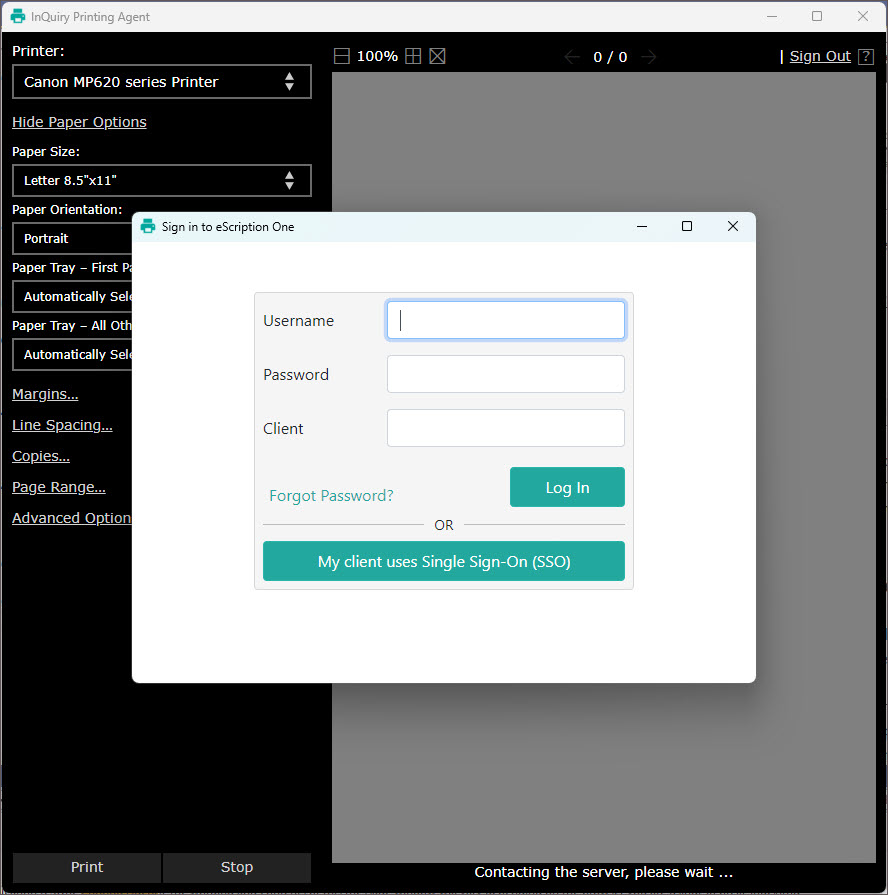
Logging in to the Printing Agent
To preview and print from the Printing Agent, log in using your InQuiry credentials. You only need to log in the first time you print. You will stay logged in until you log out of InQuiry.
Previewing and Printing Documents
You can preview and print notes from workflow folder grids, the Note Viewer, Note Editor, and Note Info. The Printing Agent also supports printing envelopes and cover letters.
Print a Single Document From the Grid
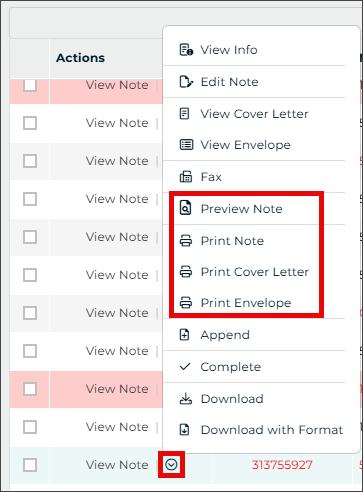
From any workflow folder or Search All, select Preview Note, Print Note, Print Cover Letter, or Print Envelope from the Actions column.
Print Multiple Documents from the Grid

Check the box next to each note, open the Bulk Actions menu above the grid, and choose Print Note.
Print from the Viewer, Editor, or Info

Use the ellipsis menu in the Note Viewer, Note Editor, or Note Info to select:
- Print – sends the note to the default printer without previewing
- Print Preview – opens a rendered PDF of the note in the Printing Agent
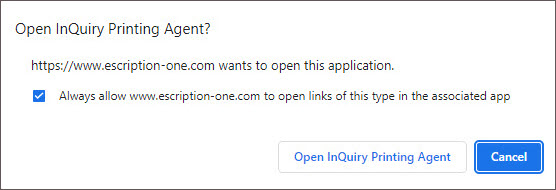
Allow Permission to Open the App
Your browser may ask if you want to allow InQuiry to open the eSOne Printing Agent. To prevent the dialog from appearing every time, allow your browser to always open links of this type. Click Open InQuiry Printing Agent or Allow.
Note
Granting permission to open the Printing Agent is required to preview and print documents.
After clicking Print Preview, the Printing Agent opens and renders the document. Print settings appear on the left. If changed, the document re-renders automatically. Click Stop to cancel rendering.
Click Print to send the document to the printer.

If you print without previewing, the document prints immediately to the default printer. The preview pane remains blank.
Note formatting uses the dictating provider’s settings—not the settings of the logged-in user.
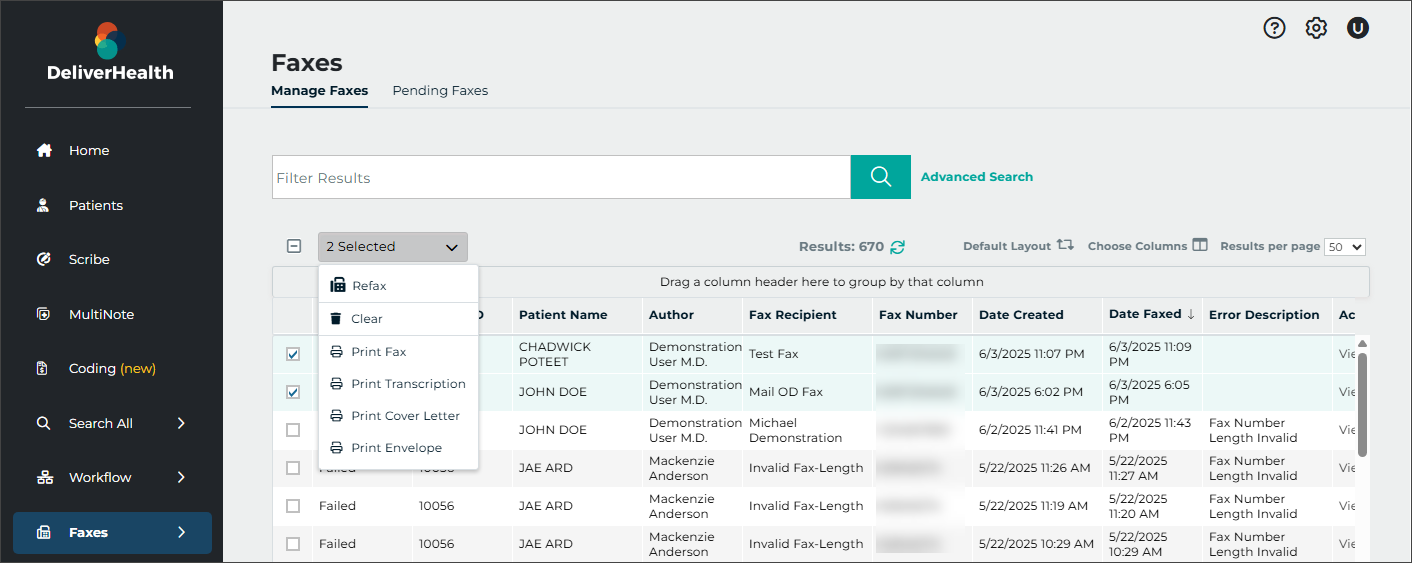
Printing Faxes
You can also print faxes, notes, cover letters, and envelopes directly from Services > Manage Faxes.
Print Settings
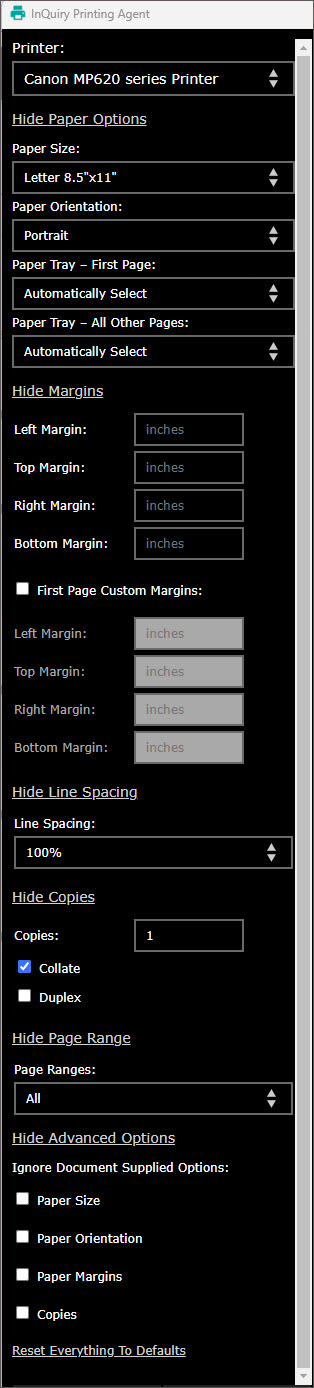
The left panel in the Printing Agent allows customization of print output. Changes apply to the current job unless overridden by the Ignore Document Supplied Options setting.
System printers appear in the printer list, with the default printer selected.
Print Settings Categories
- Paper Options – Choose paper size, orientation, and printer tray.
- Margins – Adjust page margins. Use First Page Custom Margins for different first-page values.
- Line Spacing – Adjust space between lines.
- Copies – Set copy count, enable collating, and duplex printing.
- Page Range – Choose to print all, the current page, or custom pages.
- Advanced Options – Override InCommand defaults. Click Reset Everything to Defaults to restore original settings.
Canceling a Print Job
Click Cancel Printing in the InQuiry print dialog to cancel the job and any follow-up actions like completing or logging batches.

Closing the Printing Dialog
Click Close to exit the print dialog. You can still print from the agent, but no batch log will appear.

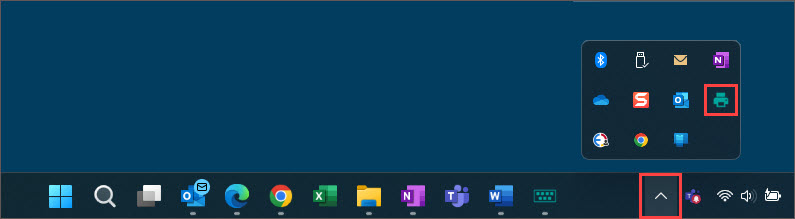
The agent continues running in the Taskbar Corner Overflow. To reopen it, click the up arrow in the taskbar and then click the Printing Agent icon. It also reopens automatically on the next preview.
Updating the Printing Agent
When updates are available, a message appears after logging in. Click the link to download the update or dismiss the message.
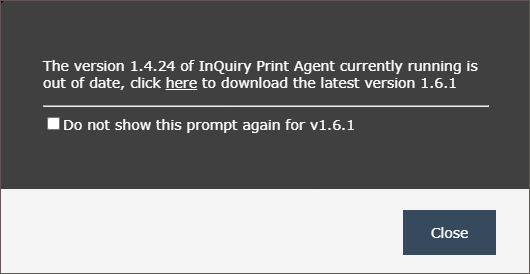
Admins can suppress these messages at the user level.
Uninstalling the Printing Agent
To uninstall, open the Control Panel, go to Apps, search for InQuiry Printing Agent, and select Uninstall.